Requirement:
- Laptop or Desktop running on Linux OS
- Working Tata photon whiz or Tata photon plus modem.
STEP 1:
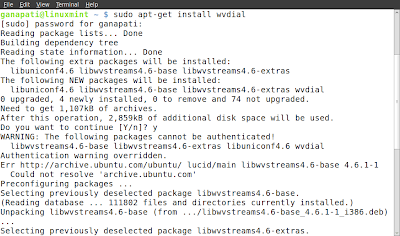
First off all you need to install the PPP dialler on your computer. To do so, open the Terminal and type the following command:
On Linux Mint / Ubuntu:
sudo apt-get install wvdial
or(for root user)

On RedHat Linux: (for root user)
yum install wvdial
On Opensuse / Suse: (for root user)
zypper install wvdial
STEP 2:
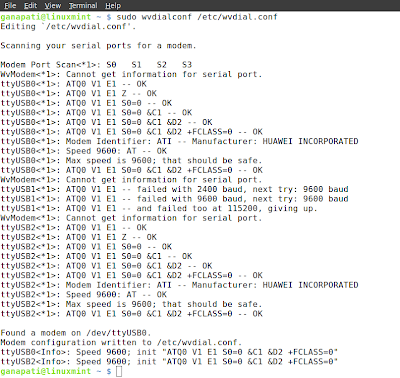
Connect the Modem to the Laptop/Desktop and ensure that the device is properly connected. Now open the Terminal and type the following command:
On Linux Mint / Ubuntu
sudo wvdialconf /etc/wvdial.conf
or(for root user)
wvdialconf /etc/wvdial.conf

On RedHat Linux / Opensuse / Suse (for root user)
wvdialconf /etc/wvdial.conf
STEP 3:
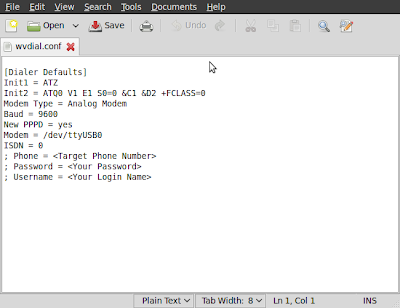
We need to edit the file /etc/wvdial.conf . We can use vi editor or any other text editor but as most of us are more comfortable with gedit we can type the following command:
On Linux Mint/Ubuntu
sudo gedit /etc/wvdial.conf
or(for root user)
gedit /etc/wvdial.conf

On RedHat Linux / Opensuse / Suse (for root user)
gedit /etc/wvdial.conf
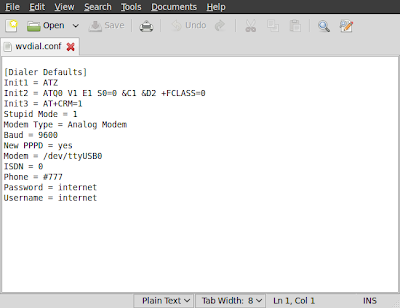
Make the following changes in the configuration file.
1. Delete the semi colon before last three lines phone, username, password
2. Enter phone no #777 username and password internet.
3. add this 2 extra lines in the configuration file at the last
Init3 = AT+CRM=1
Stupid Mode = 1

We are now done.
To connect to the internet , type the following command on the Terminal
On Linux Mint / Ubuntu
sudo wvdial
or(for root user)
wvdial

On RedHat Linux / Opensuse / Suse (for root user)
wvdial
Open your favourite browser and start browsing.
Press Ctrl + C to end the call.
